7 Tips for Choosing Printed Cardboard Boxes?
Choosing printed cardboard boxes is not only a branding decision. It is also a test of protection, usability, cost control, and environmental responsibility. A bright package may attract attention, but weak board can disappoint customers when corners collapse or moisture reaches the product.
Packaging consultant Lisa McTigue Pierce has emphasized, “Packaging must protect the product before it promotes the brand.” That principle gives this topic a practical starting point. The best printed cardboard boxes should match the product’s weight, shape, shipping distance, and storage conditions. They should also display clear artwork, readable information, and consistent colors across production batches.
Small details matter. A box opening smoothly feels better in the customer’s hands. A reinforced edge survives a rough delivery route. A matte finish can prevent distracting glare under store lighting. However, choosing the most attractive option is not always wise. I have seen attractive samples fail when stacked, folded, or exposed to humidity. That is easy to overlook.
This guide explores seven useful tips for selecting printed cardboard boxes. It considers board strength, printing quality, structural design, sizing, sustainability, supplier reliability, and total cost. These factors often overlap. A thinner box may reduce material use, yet require extra inserts or replacement shipments. A premium finish may improve shelf appeal, but increase waste or production expense.
There is no perfect box for every product. The right choice depends on evidence, testing, and honest priorities. Before approving a large order, request samples and inspect them under realistic conditions. Sometimes, the best decision is less impressive visually. It is the one that arrives intact.
Define Your Packaging Needs and Product Requirements
Choosing printed cardboard boxes starts with the product, not the artwork. Measure its length, width, and height after adding inserts, wrapping, or protective padding. Then record its weight, fragility, moisture exposure, and expected shipping conditions. These details define the box size, board strength, coating, and print finish. Small products still need practical clearance. Too much space increases movement and material use, while a tight fit can crush corners. I learned this after testing a box that looked efficient but damaged edges during repeated handling.
Create a simple requirement sheet before requesting samples. Include product dimensions, target quantity, opening style, closure method, storage limits, and delivery route. Specify whether the box needs dividers, contact protection, tamper evidence, or easy recycling. Printed surfaces should support the product’s role. Use readable instructions, accurate measurements, handling symbols, and colors that remain clear under warehouse lighting. Ask for a physical sample, not only a digital proof. Check folding accuracy, seam strength, print alignment, and how the box feels in one hand. Do not trust appearance alone.
Real conditions can expose hidden weaknesses. Test sample boxes with realistic weight, stacking pressure, vibration, and humidity changes. If the product is fragile, inspect it after repeated drops from practical handling heights. Requirements may also shift with seasonal volume or new product sizes. Leave limited flexibility where possible, but avoid designing for every imagined problem. My own early specifications were too general, which caused extra revisions and unnecessary material. A more honest requirement list often produces a simpler, safer box.
Select the Right Cardboard Grade, Size, and Structure
Choosing Printed Cardboard Boxes: Select the Right Cardboard Grade, Size, and Structure
A printed box should protect the product before it promotes it. Start with the cardboard grade. Lightweight folding cartons suit dry, low-weight items, while stronger corrugated board handles heavier products and delivery pressure. Single-wall board works for many shipments. Double-wall board adds resistance when stacking or long-distance transport matters. Ask for compression and edge-crush data, not vague claims.
Measure the packed product, not the product alone. Leave enough space for cushioning, but avoid a large empty box that increases movement and shipping cost. A few millimeters can change the fit. Check length, width, and height after inserting the real packaging materials. I once approved a sample that looked accurate until the inner wrap was added. It was too tight.
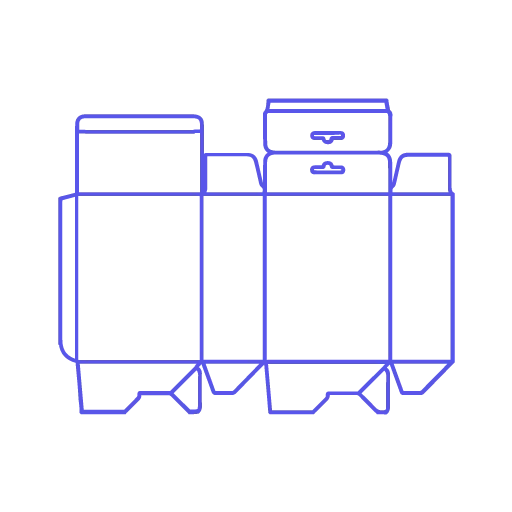
Structure affects both protection and presentation. Tuck-end cartons open quickly, while auto-lock bases can improve assembly speed. Inserts reduce shifting and keep printed surfaces cleaner. Consider panel direction, fold lines, glue areas, and the box’s opening experience. Print coverage should match the board surface and expected handling. Request a physical prototype before ordering. Test it with drops, stacking, moisture exposure, and repeated opening. The first sample may fail. That is useful evidence, not wasted effort. Suppliers should explain material specifications, tolerances, and testing methods clearly, so your final choice rests on measurable performance rather than appearance alone.
7 Tips for Choosing Printed Cardboard Boxes: Select the Right Cardboard Grade, Size, and Structure
Use this checklist to match the box material, dimensions, construction, and print finish to the product and its distribution conditions.
Evaluate Printing Methods, Design Quality, and Brand Visibility
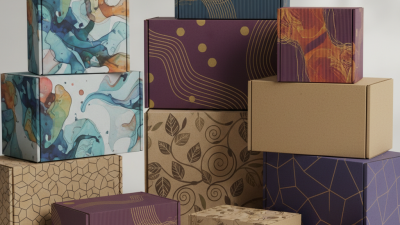
Choosing printed cardboard boxes requires more than a bright logo. Start by matching the printing method to the box’s purpose, surface, and budget. Flexographic printing suits larger runs and simple graphics. Digital printing handles short runs, variable artwork, and quick revisions. Offset printing can produce fine images, but it often needs a laminated or mounted surface. Ask for a physical proof, not only a screen preview. Check small text, barcode contrast, color shifts, and ink rub after folding. In my packaging tests, a dark blue panel looked sharp on screen but turned dull on kraft board. I approved it too quickly. That mistake taught me to inspect samples under warehouse lighting.
Design quality affects both recognition and handling. Keep the main mark visible on the top and two side panels when boxes may be stacked. Use strong contrast, generous spacing, and type large enough for a quick read. Do not fill every empty area. Quiet space can make a package look more confident. Measure how graphics align across seams, flaps, and corners. A misaligned pattern can make careful work appear cheap. Request production tolerances in writing, including color variation and print registration. Review the supplier’s sample history, material specifications, and quality checks. Ask how damaged cartons are recorded and replaced. Brand visibility is not just loud color. It is consistent detail, readable information, and a box that still looks intentional after shipping.
Check Sustainability, Safety Standards, and Material Certifications
Choosing printed cardboard boxes requires more than comparing colors, prices, and delivery times. The material should match the product’s weight, shape, and storage conditions. Ask for the paper grade, flute profile, recycled content, and moisture resistance. A box that feels sturdy in a showroom may weaken after several hours in a damp warehouse. Test it there.
Safety documentation deserves close attention. Request evidence of compression testing, ink suitability, and adhesive performance. For food, cosmetics, or children’s products, check whether the box meets the relevant contact and migration requirements. Certifications should be current, traceable, and linked to the actual production site. A supplier’s general certificate may not cover every box specification. That detail is easy to miss.
Sustainability claims also need practical proof. Look for verified recycled-content percentages and responsible fiber sourcing. Ask how waste is handled during printing and whether coatings affect recyclability. Plastic-laminated surfaces can look premium, but they may complicate recovery. Not every “green” statement is precise. I have seen buyers accept vague claims because the packaging sample looked convincing. That was a mistake. Keep the test records, approval dates, and batch details together. Suppliers should explain changes in paper, ink, or adhesive before production. Small material changes can affect strength, safety, and recycling performance.
Compare Suppliers, Costs, Minimum Orders, and Delivery Options
Choosing printed cardboard boxes requires more than attractive artwork.
Tip 1: Compare suppliers by board grade, print accuracy, sample quality, and communication speed. Ask for a physical sample, not only digital images. Check fold lines, glue strength, and color under warehouse lighting.
Tip 2: Request itemized quotes. Separate setup fees, printing, tooling, packing, freight, and taxes. A low unit price can hide preparation charges. I have seen estimates change after artwork approval. That detail matters.
Tip 3: Compare total landed cost at your expected volume. Include damaged units, storage, and rush delivery. A cheaper box is not cheaper if it arrives late.
Tip 4: Examine minimum order quantities. A large MOQ may reduce unit cost but trap cash in unused packaging. Start with a realistic forecast, even if it feels less impressive. Ask whether mixed sizes or staged production are possible. Suppliers may offer flexibility, but never assume it.
Tip 5: Confirm lead times in writing. Request separate dates for artwork approval, sampling, production, and dispatch.
Tip 6: Compare delivery options, including parcel, pallet, and scheduled freight. Check carton dimensions and unloading requirements before ordering.
Tip 7: Build a small buffer for holidays, reprints, and inspection delays. My own planning has sometimes been too optimistic. A two-week cushion can protect a product launch.
Review payment terms, replacement policies, and quality checks before signing. Trust grows from measurable details, not confident promises.